Tips You Must Know For Successful Fence Staining
Whether your wooden fence is years old or recently installed, it can benefit from a single inexpensive addition: stain or clear sealer. Applying wood stain to the fence improves its design and prolongs the lifespan of your outdoor structure.
For professional quality results, work with a semitransparent oil-based stain if available, designed for the exterior. These stains elegantly enhance the natural look of the underlying wood with a subtle tint, and, as a bonus, boast formulas that slow the growth of mildew and rot as well as protect the wood from ultraviolet light exposure. With basic cleaning supplies or water only procedure and this straightforward tutorial on how to stain a fence, you can refresh your wooden privacy wall in as little time as a weekend.
How to Stain a Fence
STEP 1: Choose the right days for your project.
Before staining a wood fence, check the weekly weather forecast and select a week with temperatures between 15 and 25 degrees Celsius, and no precipitation expected for the next 48 hours. If you’re discouraged by the forecast, remember that “good things come to those who wait”. Extreme cold can prolong the drying time of wood stain, while the extreme heat can dry out stain too quickly and leave behind unwanted marks or cracks on the fence.
STEP 2: Prepare the wood for painting.
Depending on the current condition of your fence, you may need to strip or sand the surface. If your fence is new or untreated, you might consider your self lucky, but if the fence is stained, you might want to read this.

Removing stain and varnish:
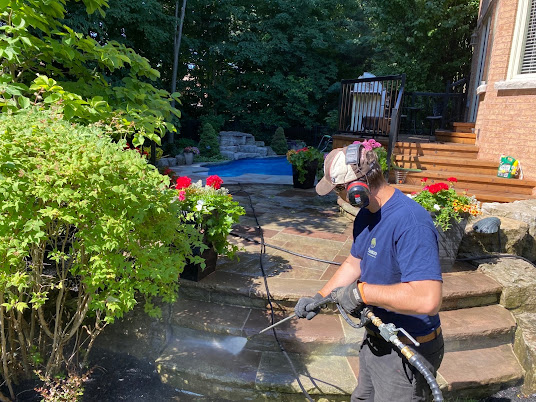
Apply stain or finish stripper to the slats according to the manufacturer’s instructions, then scrub the slats with a bristle brush to remove unwanted varnish. Many manufacturer claim a wonder solution for your fence, if I may say, "there is no wonder product"! This process could take a long time to accomplish. Many professionals turn to pressure washing instead. But, you might want to be careful with high pressurized water, it can potentially damage your fence if not properly used.
STEP 3: Clean the fence thoroughly and let dry.
Clean the fence with water by using pressure washer. This will remove light to moderate dirt accumulations and complete the job of the wood stain stripper if used in blasting away any old varnish from the fence, if applicable. If using a power washer, opt for a commercial unit with capability of adjusting the pressure to your need. Many say that pressure should be no more than 2000 psi but this is not accurate! If you use a residential rental unit, it will produce pressure up to 4000 psi but it will have an output not more than 2-3 GPM. That will directly tempt you to close in to your fence and that is the killer! The closer you come to the fence the more damage you will make. Pressure is higher at the tip of the hand held unit. Commercial pressure washers have 4-10 GPM and a pressure regulator in order to stay away from fence and still clean it efficiently. Beside the pressure and water output, you should use a wide tip in a linear motion with your wood grain. Don't use a narrow tip in a circular motion! Make sure to let the wood dry out completely before continuing.
STEP 4: Proceed to applying stain to the fence slats.
Enlist a brush, roller, or sprayer to stain the slats.
A natural bristle brush is the best way to encourage oil-based wood stain to permeate wooden fence slats. Dip the tip of the brush into a can of stain, then coat any horizontal slats of the fence from left to right. If using a roller, opt for a medium nap roller cover, (don't use a roller that goes beyond the wood slats) then fully saturate roller with the stain. Stain the fence in linear motion toward the wood grain, avoid circular motion across the slats.
If using a sprayer, follow the same approach as for how to stain a fence with a roller, but stand back a comfortable distance from the fence to apply colour.
STEP 5: Let the stain dry, then apply additional coats as desired.
When the entire fence has been stained, let it dry according to the stain manufacturer’s instructions. Usually the stain should be dry within 24-48Hr. Apply additional coats of stain as needed to achieve the desired depth of colour. A single coat should be sufficient for a new wood fence or one that you also plan to seal. Keep in mind that every additional coat of stain will potentially darken the entire fence and or make it more of a solid stain look.

Comments
Post a Comment